San Antonio, a city where Tex-Mex meets bold flavors, has become a hub for mouthwatering culinary creations. At the heart of its culinary repertoire lies the grilled Mexican chicken, a dish renowned for its robust marinade and smoky grilled perfection. This marinade captures the vibrancy of traditional Mexican ingredients like citrus, chili, garlic, and spices, creating a fusion that’s both aromatic and irresistibly delicious.
Whether you’re hosting a backyard barbecue, planning a weeknight dinner, or exploring new grilling techniques, this recipe will guide you to achieve juicy, flavor-packed chicken every time. Let’s dive into the secret behind this San Antonio specialty, starting with its key ingredients and preparation.
Table of contents
- Key Ingredients for San Antonio Grilled Mexican Chicken Marinade
- Preparation of the Marinade
- Marinating the Chicken
- Grilling Techniques for San Antonio Grilled Mexican Chicken
- Serving Suggestions for San Antonio Grilled Mexican Chicken
- Health Benefits of Grilled Mexican Chicken
- Frequently Asked Questions
- Conclusion
Key Ingredients for San Antonio Grilled Mexican Chicken Marinade
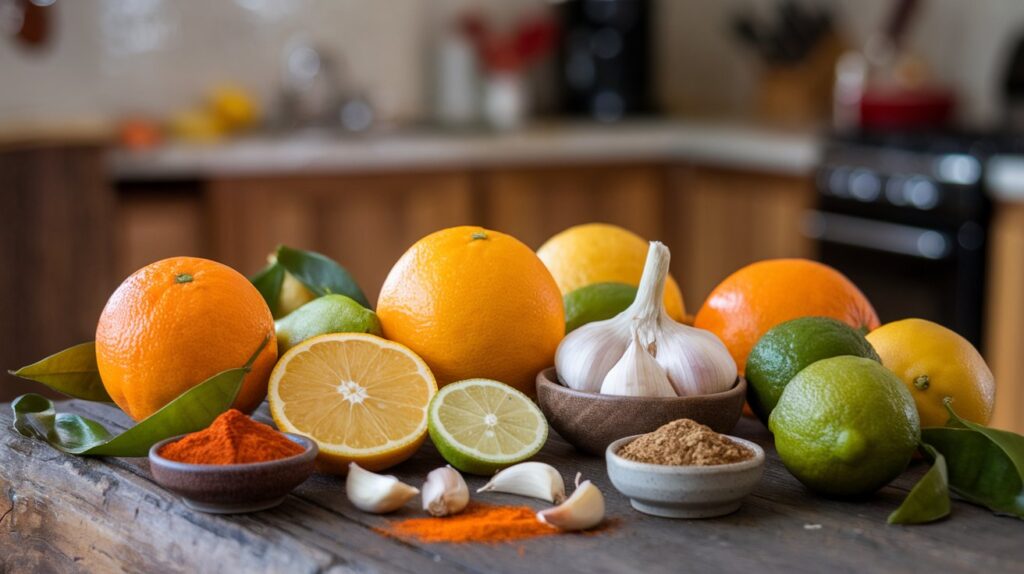
Creating the perfect San Antonio-style marinade requires a precise blend of fresh and bold ingredients. Let’s explore each component to understand how it contributes to the marinade’s rich flavor profile.

Citrus Juices – The Tangy Base
Citrus juices form the backbone of this marinade, acting as both a flavor enhancer and a natural tenderizer for the chicken.
Lime Juice
Lime juice brings a sharp, tangy flavor that’s quintessential in Mexican cuisine. Its acidity breaks down proteins in the chicken, ensuring tenderness.
Orange Juice
The sweetness of orange juice balances the lime’s tang, creating a well-rounded flavor profile. It also adds a subtle caramelization during grilling.
Lemon Juice (Optional)
If you want an extra tart kick, a splash of lemon juice can be added. This is optional but complements the lime and orange beautifully.
Chili and Spices – The Heat and Depth
Mexican cuisine is known for its bold and spicy flavors, and the marinade wouldn’t be complete without a blend of chilies and spices.
Chili Powder
Chili powder provides warmth and a subtle smoky undertone. Choose mild or spicy varieties depending on your heat preference.
Paprika
Smoked paprika is a key ingredient, contributing a smoky aroma and enhancing the grill flavor.
Cumin
Cumin adds an earthy depth, giving the marinade an authentic Mexican flair.
Fresh Herbs and Garlic – The Aromatic Boost
No Mexican marinade is complete without fresh herbs and garlic, which add layers of complexity to the flavor.
Garlic
Fresh minced garlic infuses the marinade with its robust, pungent flavor, permeating the chicken as it marinates.
Cilantro
Cilantro offers a burst of freshness and ties together the citrus and spice elements. Use chopped fresh cilantro for the best results.
Oils and Liquids – The Flavor Carriers
A balanced marinade needs oils and additional liquids to bind the ingredients and help the chicken retain moisture during grilling.
Olive Oil
Extra-virgin olive oil enriches the marinade, ensuring that the chicken remains juicy and helps the spices adhere to the meat.
Soy Sauce
Adding a splash of soy sauce introduces umami depth, enhancing the overall savoriness of the marinade.
Apple Cider Vinegar
This adds a subtle tang and complements the citrus juices for a layered acidic touch.
Sweeteners – A Touch of Balance
A small amount of sweetness balances the heat and acidity of the marinade.
Honey
Honey not only balances flavors but also helps in creating a caramelized crust during grilling.
Brown Sugar (Optional)
For an extra hint of sweetness, add a pinch of brown sugar. It pairs well with the chili and spices.
🌮 Cooking Tips:
✔️ Marinate for Maximum Flavor: Let the chicken marinate for at least 2 hours, but overnight is even better for deeper flavor. The citrus juices tenderize the meat while the spices infuse it with authentic Mexican taste.
✔️ Grill at the Right Temperature: Cook the chicken over medium-high heat (about 375-400°F / 190-200°C) to get a perfect sear while keeping the inside juicy. Avoid high heat, which can burn the marinade.
✔️ Achieve Juicy Chicken: Let the chicken rest for 5 minutes after grilling before slicing. This helps retain moisture for tender, flavorful bites.
✔️ Spice Level Control: Want it spicier? Add chopped jalapeños or a pinch of cayenne pepper to the marinade. Prefer it mild? Reduce the chili powder and use sweet paprika instead.
✔️ Serving Suggestions: Pair it with grilled corn, avocado salsa, or Mexican rice for an authentic Tex-Mex experience. Also great in tacos or burrito bowls!
Preparation of the Marinade
Preparing the San Antonio-style grilled Mexican chicken marinade is simple and rewarding. By following these steps, you’ll ensure your chicken absorbs all the bold and vibrant flavors. Let’s walk through the process together.

Step 1 – Gather Your Ingredients
To begin, it’s essential to have everything you need ready and measured. This helps the process flow smoothly. Here’s what you’ll need:
- Citrus Juices: Freshly squeezed lime juice (¼ cup), orange juice (½ cup), and optional lemon juice (2 tablespoons).
- Garlic: Use 4-5 cloves, minced or finely grated, for maximum flavor.
- Chili Powder and Paprika: 1 teaspoon each, but you can adjust to your preferred level of spice.
- Cumin: 1 teaspoon to add warmth and earthiness.
- Fresh Cilantro: 2 tablespoons, finely chopped, for a burst of freshness.
- Olive Oil: ¼ cup to coat the chicken and lock in moisture.
- Soy Sauce: 2 tablespoons to add a savory, umami touch.
- Honey: 1 tablespoon for a subtle sweetness and caramelized finish.
- Salt and Pepper: Adjust to taste for balance.
Step 2 – Mix the Marinade
Once you have the ingredients, it’s time to create the marinade. Use a large mixing bowl or a resealable plastic bag for easier cleanup.
Blend the Citrus Base
To start, pour the lime juice, orange juice, and optional lemon juice into the bowl. Next, whisk them together thoroughly. The citrus will not only tenderize the chicken but also give it a tangy, refreshing flavor.
Add the Aromatics and Herbs
Afterward, mix in the minced garlic and chopped cilantro. This step ensures the marinade has a robust and aromatic base that will penetrate the chicken deeply.
Incorporate the Spices
Now, sprinkle in the chili powder, smoked paprika, and cumin. Stir well to distribute the spices evenly throughout the marinade. This helps ensure every bite of the chicken is flavorful.
Finish with Oils and Sweeteners
Next, slowly pour the olive oil into the mixture while whisking. Doing this helps emulsify the marinade, making it rich and well-blended. Then, stir in the honey to add sweetness. Finally, include the soy sauce and a splash of apple cider vinegar for depth and balance.
Step 3 – Adjust the Flavor
At this point, taste the marinade to ensure it’s perfect for your palate. If you prefer a tangier flavor, you can add more lime juice. For extra heat, increase the chili powder slightly. On the other hand, if the flavors feel too bold, balance them with a pinch of sugar or an extra drizzle of honey.
Step 4 – Prepare for Marination
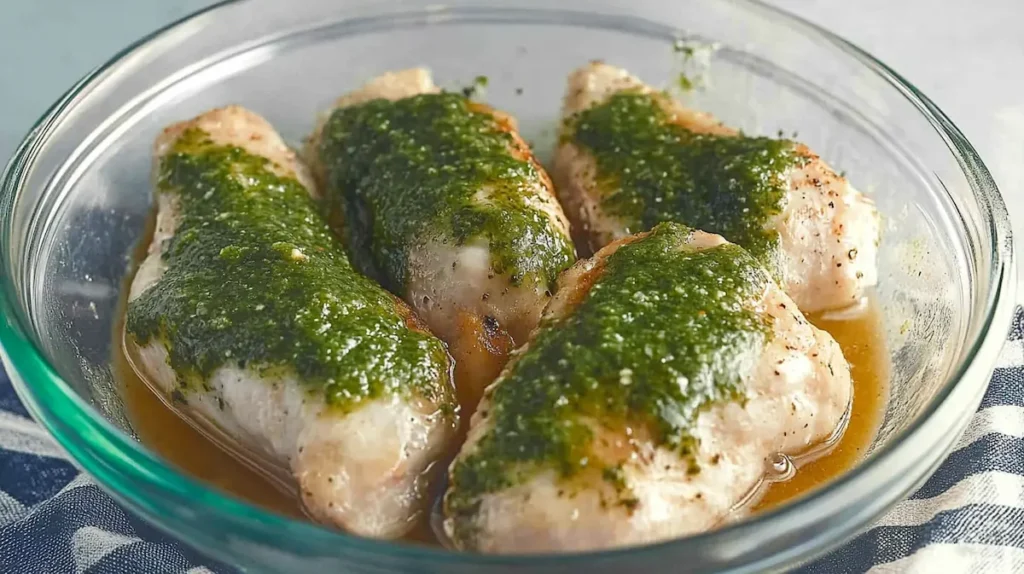
Now that the marinade is ready, it’s time to prepare your chicken for the next step. Place the chicken pieces into a resealable plastic bag or a large container. Then, pour the marinade over the chicken, ensuring each piece is fully coated. Seal the bag or cover the container tightly. Next, refrigerate the chicken for at least 2 hours, although marinating overnight will give the best results.
By following these steps, you’ll create a marinade that guarantees flavorful, juicy grilled Mexican chicken every time.
Marinating the Chicken
Marinating the chicken is a crucial step in achieving the authentic San Antonio-style grilled Mexican chicken flavor. Proper marination allows the spices, citrus, and herbs to penetrate the chicken, ensuring every bite is infused with rich, bold flavors. Let’s break this process down into manageable steps for the best results.
Step 1 – Prepare the Chicken
Before marinating, it’s essential to prepare the chicken properly. Here’s how:
- Choose Your Cuts: Bone-in, skin-on chicken thighs or drumsticks work best for grilling, as they stay juicy and flavorful. However, you can also use boneless breasts or wings depending on your preference.
- Clean and Trim: Rinse the chicken under cold water, then pat it dry with paper towels. Trim any excess fat or skin if needed.
- Optional Tenderizing: For larger cuts, you can lightly pound the chicken with a meat mallet to ensure even cooking and better absorption of the marinade.
Step 2 – Combine Chicken and Marinade
Now that the chicken is ready, it’s time to combine it with the marinade.
Use a Resealable Bag or Container
- Place the chicken pieces into a large resealable plastic bag or a shallow container. Using a bag ensures that the marinade coats the chicken evenly and minimizes cleanup.
- Pour the marinade over the chicken, making sure all pieces are fully submerged or coated.
Massage the Marinade into the Chicken
- Seal the bag or cover the container tightly.
- Gently massage the chicken through the bag to distribute the marinade evenly. This helps the flavors reach every part of the chicken.
Step 3 – Refrigerate for Flavor Infusion
Refrigeration is key to allowing the marinade to work its magic.
Ideal Marinating Time
- For best results, marinate the chicken for 4–6 hours.
- If possible, let it sit overnight for maximum flavor.
- In a pinch, 2 hours of marinating will still impart good flavor, though longer is recommended.
Storage Tips
- Place the sealed bag or container on a plate to catch any potential leaks.
- Keep the chicken in the coldest part of your refrigerator to maintain freshness.
Step 4 – Flip and Recoat
For even flavor distribution, flip the bag or stir the chicken in the container halfway through the marinating process. This ensures that all sides absorb the spices, herbs, and citrus flavors equally.
Step 5 – Remove and Prepare for Grilling
When you’re ready to grill, remove the chicken from the refrigerator and let it sit at room temperature for 20–30 minutes. This step allows the chicken to cook more evenly on the grill.
Shake Off Excess Marinade
- Take the chicken pieces out of the marinade, letting any excess drip off.
- Do not wipe off the marinade entirely, as it adds flavor during grilling.
Discard Leftover Marinade
- For safety reasons, discard any remaining marinade that has been in contact with raw chicken.
- If you’d like to use the marinade as a sauce, boil it for several minutes to eliminate bacteria.
By following these marinating steps, you’ll set the stage for perfectly grilled chicken bursting with San Antonio-inspired Mexican flavors.
Grilling Techniques for San Antonio Grilled Mexican Chicken
Grilling transforms marinated chicken into a smoky, flavorful dish that’s perfect for any occasion. By using the right techniques, you can make sure your chicken turns out juicy and packed with flavor. Follow these easy steps to achieve amazing results every time.
Step 1 – Preheat the Grill
First and foremost, a well-heated grill ensures your chicken cooks evenly and doesn’t stick.
Choose Your Grill
- Gas Grill: This option is simple to use and provides consistent heat, making it great for beginners.
- Charcoal Grill: For a more authentic smoky taste, use a charcoal grill. It adds an extra layer of flavor that pairs perfectly with the marinade.
Preheating Instructions
- If you’re using a gas grill, turn all burners to medium-high heat (375–400°F) and let it preheat for about 10 minutes.
- For a charcoal grill, light the coals and wait until they turn white-hot, then spread them evenly.
- Remember to close the lid during preheating to retain heat.
Step 2 – Prepare the Grill Grates
Before placing your chicken on the grill, take a moment to clean and oil the grates. This step prevents sticking and makes cleanup easier.
Cleaning the Grates
- Start by using a grill brush to scrub off any old residue.
- If the grates are still dirty, heat the grill briefly and scrub again for a spotless surface.
Oiling the Grates
- Dip a folded paper towel into vegetable oil, then grip it with tongs.
- Rub the oiled towel over the grill grates to create a slick, nonstick coating.
Step 3 – Arrange the Chicken on the Grill
Once the grill is ready, it’s time to place the chicken on the grates. How you position the chicken can affect how evenly it cooks.
Direct vs. Indirect Heat
- Direct Heat: Ideal for smaller pieces like boneless thighs, wings, or thin cuts, as they cook quickly.
- Indirect Heat: Best for larger cuts such as drumsticks or bone-in breasts, preventing burning while ensuring they cook through.
Placement Tips
- Start by placing the chicken skin-side down to achieve a nice sear.
- Be sure to leave some space between each piece, which allows heat to circulate properly.
- For even cooking, close the lid after arranging the chicken.
Step 4 – Monitor and Flip
While grilling, it’s important to keep an eye on the chicken to avoid overcooking or burning.
Cooking Time
- Boneless cuts like thighs should cook for 6–8 minutes per side over direct heat.
- Larger, bone-in pieces may take 8–10 minutes per side, especially when using indirect heat.
Flipping the Chicken
- Use a pair of tongs to flip the chicken only once during grilling. Flipping too often can cause the meat to lose its juices.
- Make sure not to pierce the chicken, as this can lead to dryness.
Step 5 – Check for Doneness
Knowing when your chicken is done is key to serving a safe and tasty meal.
Internal Temperature
- Use a meat thermometer to check the thickest part of the chicken. The chicken is fully cooked when it reaches 165°F.
- If you don’t have a thermometer, keep an eye on visual cues.
Visual Cues
- The juices should run clear when you cut into the meat.
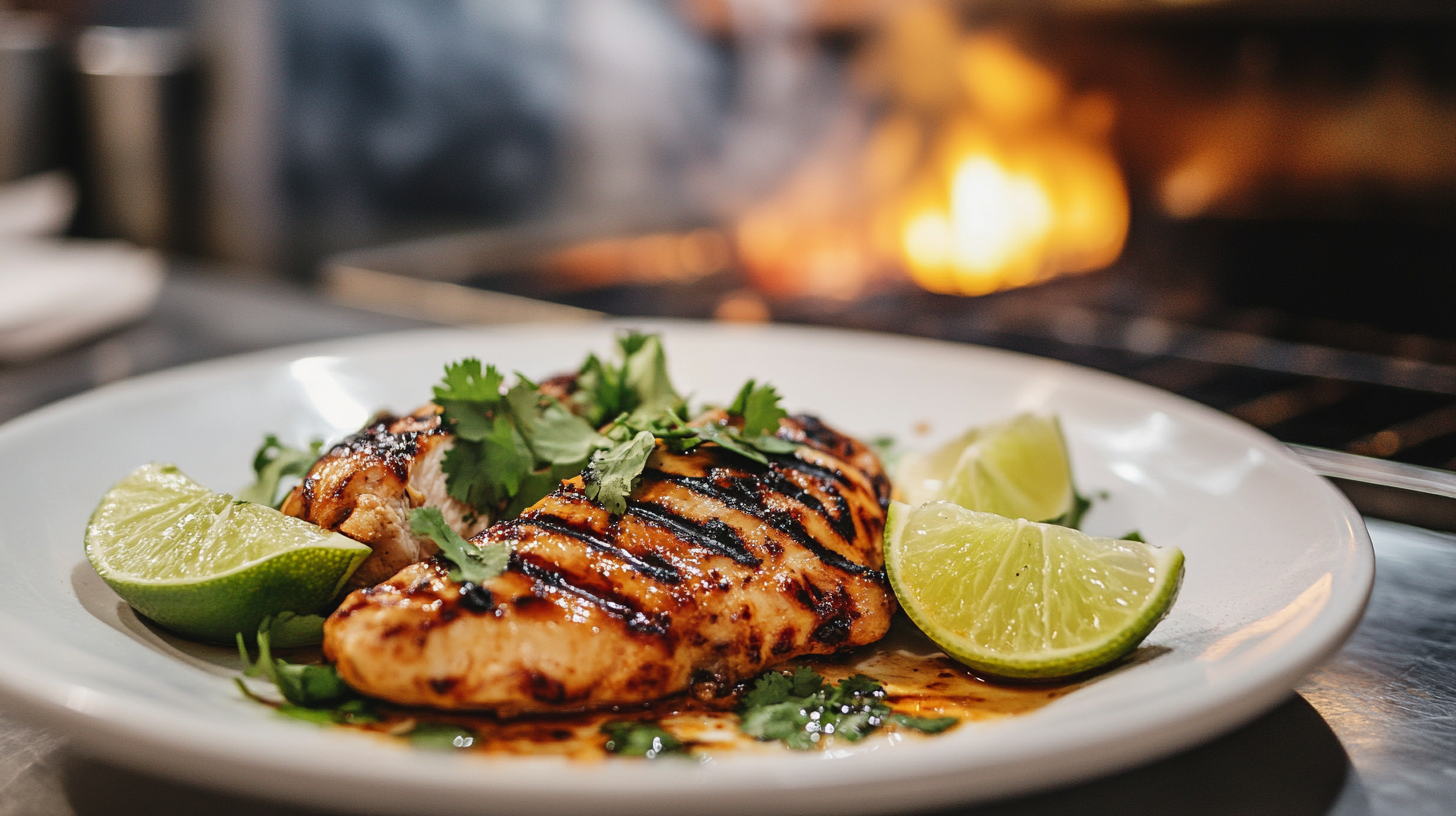
- Additionally, the skin or outer surface should be golden brown with light char marks.
Step 6 – Rest the Chicken
After grilling, letting the chicken rest for a few minutes is essential. This step allows the juices to redistribute, making the meat tender and flavorful.
Resting Instructions
- Remove the chicken from the grill and place it on a clean plate or cutting board.
- Cover the chicken loosely with foil and let it rest for 5–10 minutes before serving.
By following these grilling tips, you’ll ensure your chicken is cooked to perfection every time. With its bold marinade and smoky char, this San Antonio-style grilled Mexican chicken will impress everyone at the table.
Serving Suggestions for San Antonio Grilled Mexican Chicken
San Antonio grilled Mexican chicken is versatile, making it a fantastic centerpiece for any meal. The smoky, citrusy flavors pair beautifully with a variety of sides, sauces, and garnishes. Here are some creative and delicious serving ideas to elevate your dish.

Traditional Tex-Mex Sides
Pair your grilled chicken with classic Tex-Mex accompaniments for an authentic experience.
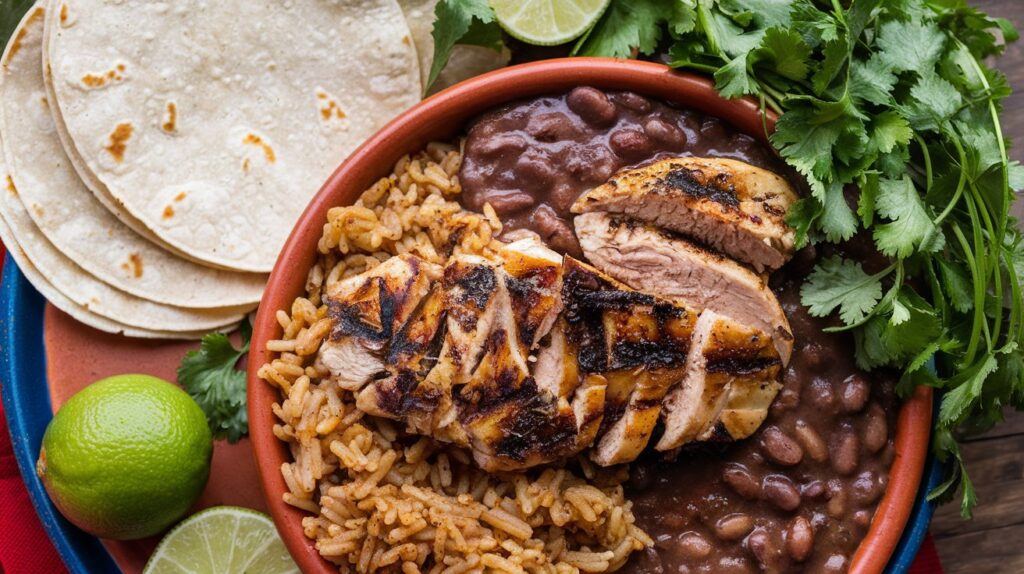
🌮 Mexican Rice
This vibrant side dish, cooked with tomatoes, onions, and spices, complements the bold flavors of the chicken. Its fluffy texture and mildly tangy flavor balance the marinade perfectly.
🥗 A Fresh Mexican Chicken Salad
A refreshing mix of crisp lettuce, cherry tomatoes, black beans, corn, avocado, and grilled chicken, tossed with a zesty lime-cilantro dressing. Light, nutritious, and bursting with flavor.
🧀 A Creamy Smoky queso dip
A rich and velvety cheese dip infused with smoky chipotle and spices. Perfect for dipping tortilla chips or drizzling over grilled chicken for an extra indulgent touch.
Refried Beans
Creamy refried beans add a hearty, satisfying element to the meal. Whether you prefer black beans or pinto beans, they’re a staple in Mexican cuisine.
Warm Tortillas
Soft, warm tortillas can be served on the side or used to wrap the chicken for homemade tacos or burritos. Corn or flour tortillas both work well.
Fresh and Zesty Accompaniments
Bright, fresh sides add contrast to the smoky flavors of the grilled chicken.
Guacamole
This creamy avocado-based dip adds richness and a cool, refreshing taste. Its mild flavors balance the spices in the marinade.
Pico de Gallo
This fresh salsa made with tomatoes, onions, cilantro, and lime juice enhances the chicken’s zesty notes. It also adds a burst of color to your plate.
Grilled Vegetables
Consider grilling bell peppers, zucchini, or corn alongside your chicken. These vegetables absorb smoky flavors and add a healthy, colorful touch to your meal.
Sauces and Garnishes
Add the finishing touch to your meal with flavorful sauces and toppings.
Salsa Verde
This tangy green salsa made from tomatillos, jalapeños, and cilantro complements the grilled chicken beautifully.
Crema Mexicana
A drizzle of this rich, tangy cream balances the heat from the spices. Substitute with sour cream if crema isn’t available.
Fresh Lime Wedges
Serving lime wedges on the side allows diners to squeeze fresh juice over the chicken for an extra citrus kick.
🥗 Perfect Side Dishes
Looking for the best pairings? Try these:
- A fresh Mexican Chicken Salad
- A creamy smoky queso dip
- Light and crisp grilled vegetables or side dishes for grilled chicken
Health Benefits of Grilled Mexican Chicken
This dish isn’t just flavorful—it’s also packed with nutritional benefits. Here’s why you can feel good about enjoying it:
Lean Protein
Chicken, especially boneless cuts, is an excellent source of lean protein, which supports muscle growth and repair.
Rich in Vitamins and Antioxidants
The citrus juices in the marinade provide vitamin C, while the garlic, cilantro, and spices offer antioxidants that boost immunity and overall health.
Low in Saturated Fats
Grilling is a healthy cooking method, as it doesn’t require excessive oil and allows excess fat to drip away.
Frequently Asked Questions
How long should I marinate the chicken?
For the best flavor, marinate the chicken for at least 4–6 hours. If time permits, overnight marination gives the most flavorful results.
Can I use the marinade as a sauce?
Yes, but only if you boil the marinade first to kill any bacteria from the raw chicken. Simmer it for 5–10 minutes to thicken and enhance its flavor.
Can I grill the chicken indoors?
Absolutely! Use a grill pan or an electric grill for similar results. Just ensure the chicken is cooked to 165°F for safety.
What if I don’t have a grill?
You can bake the marinated chicken in the oven at 400°F for 25–30 minutes or until fully cooked. Broiling for the last few minutes adds a slight char.
How do I store leftovers?
Store leftover chicken in an airtight container in the refrigerator for up to 3 days. Reheat gently in the oven or on the stovetop to maintain juiciness.
Can I freeze the marinated chicken?
Yes, you can freeze chicken in the marinade for up to 3 months. Thaw in the refrigerator overnight before grilling.
Conclusion
San Antonio grilled Mexican chicken combines the vibrant flavors of citrus, spices, and smoky char to create a dish that’s both bold and satisfying. By following this detailed guide—from preparing the marinade to mastering grilling techniques—you can bring the essence of San Antonio’s Tex-Mex cuisine to your table.
This versatile dish pairs beautifully with traditional sides, fresh accompaniments, and flavorful sauces, making it perfect for any occasion. Whether it’s a backyard barbecue, a family dinner, or meal prep for the week, this recipe is sure to impress. So fire up your grill, gather your ingredients, and enjoy the irresistible taste of San Antonio-style grilled Mexican chicken!

